I had a vision for creating a schoolhouse area in the playroom, so I went on a hunt to find the perfect products to use in this space. Read on to see how we transformed a small wall in our basement into an ideal place to play school for years to come. This post contains affiliate links.

Before Area
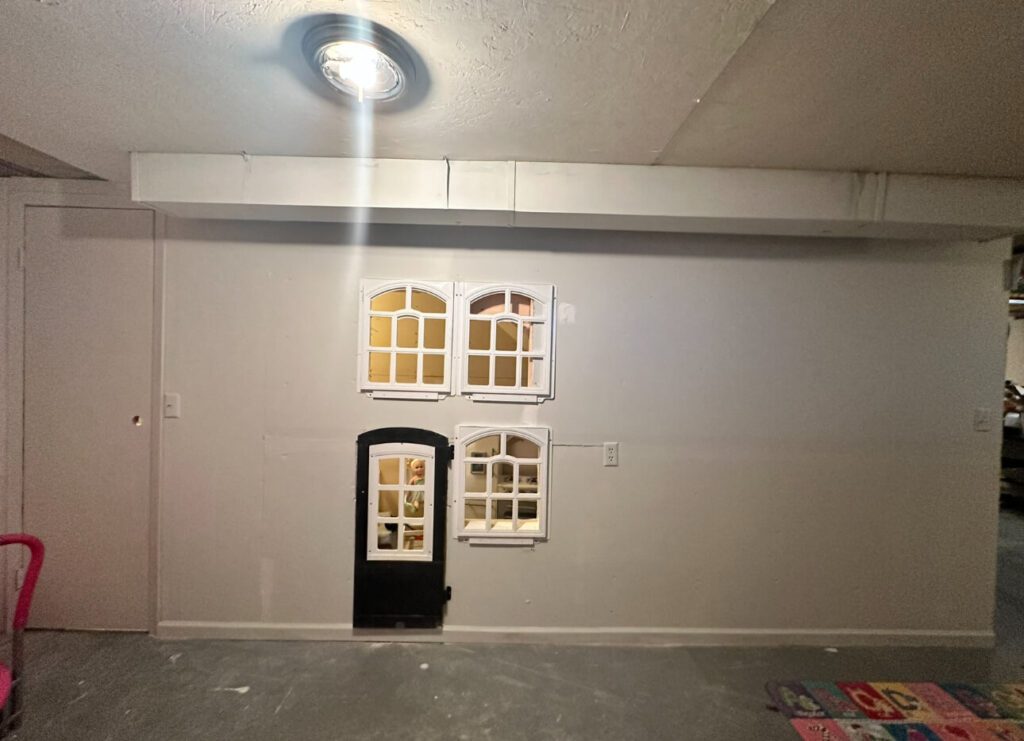
This is the before area. I planned on making the schoolhouse area to the right of the windows and doors that we cut out from under the stairs. I wanted to separate this area into three sections: coffee shop, house, and schoolhouse.
Inspiration
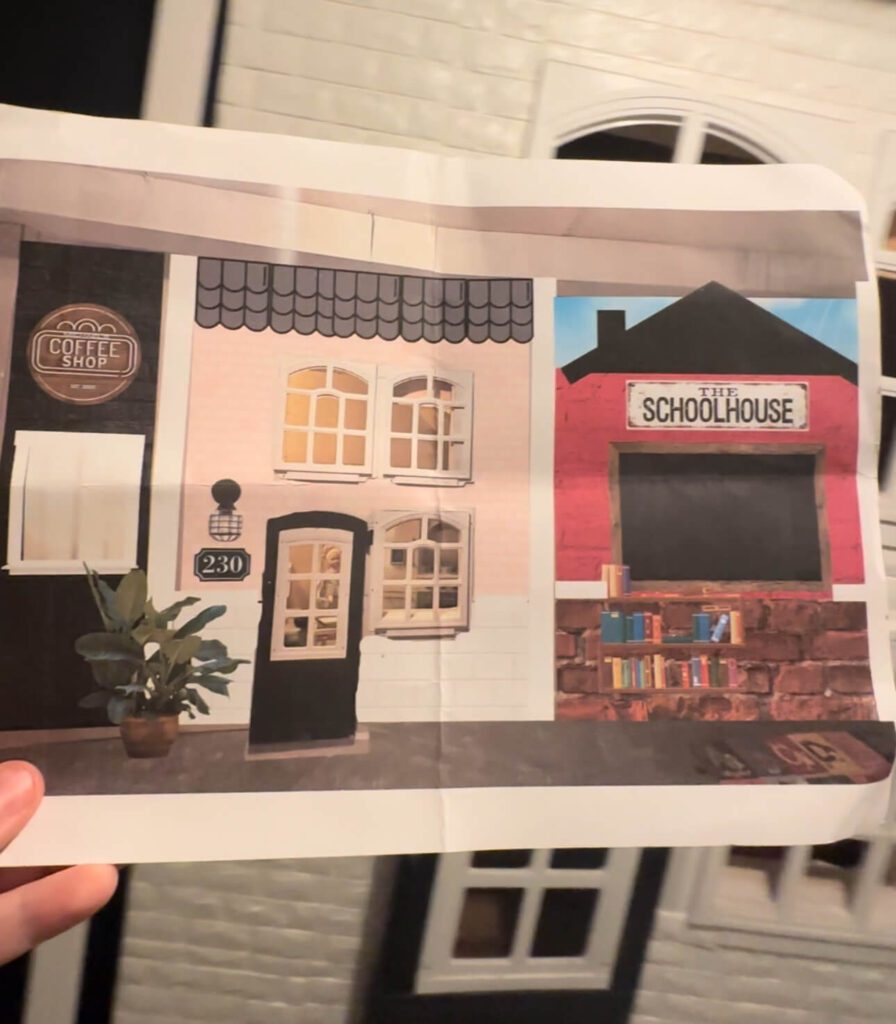
I used Canva to create my inspiration for the schoolhouse area in the playroom. I did this by taking a picture of the wall and then adding Canva elements on top of the picture until I got the look I wanted. You can definitely just sketch this out, but I LOVE using Canva to help bring my dreams into reality!
Framing the Schoolhouse
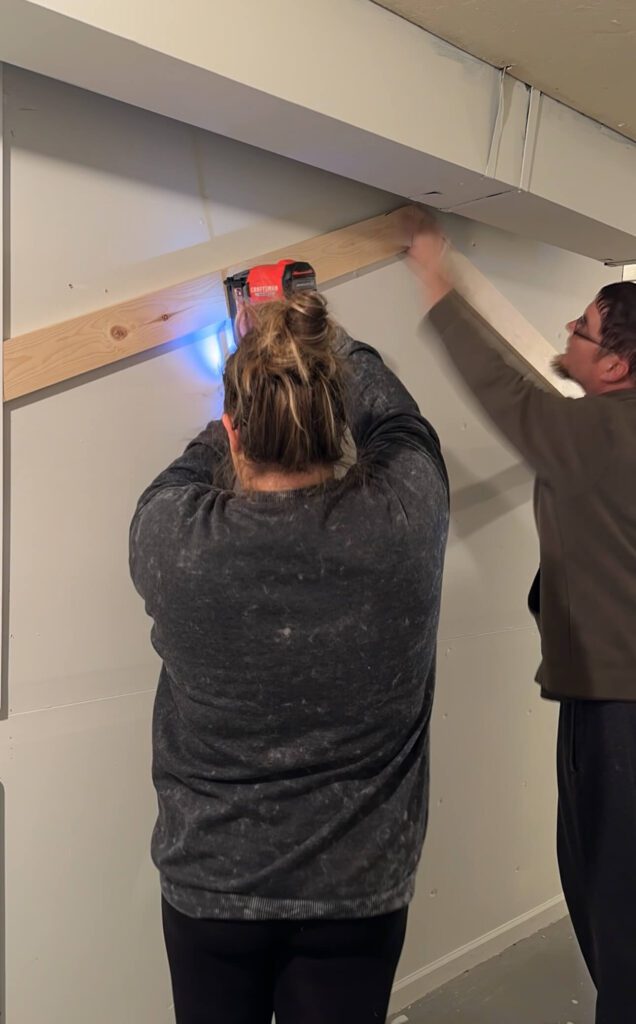
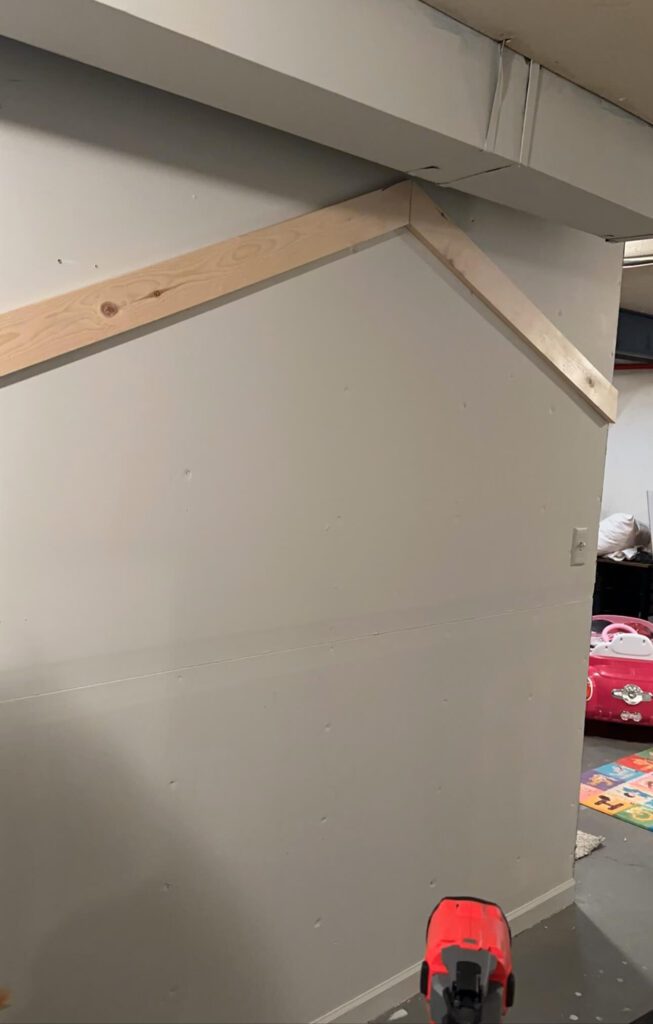
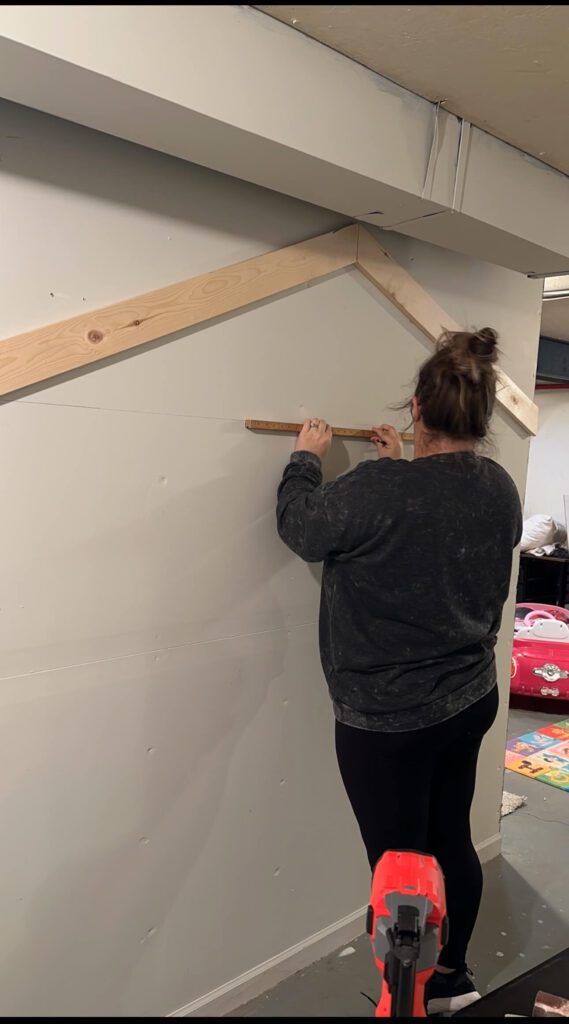
We used two 1×4 boards to frame the top of the schoolhouse. I used a nail gun to hold the boards into place. If you do not have a nail gun, you can screw the boards into the studs. My husband cut the boards at an angle so they would fit together correctly. Then I drew a line where I wanted the black roof to be.
Applying Faux Brick Panels and Wallpaper
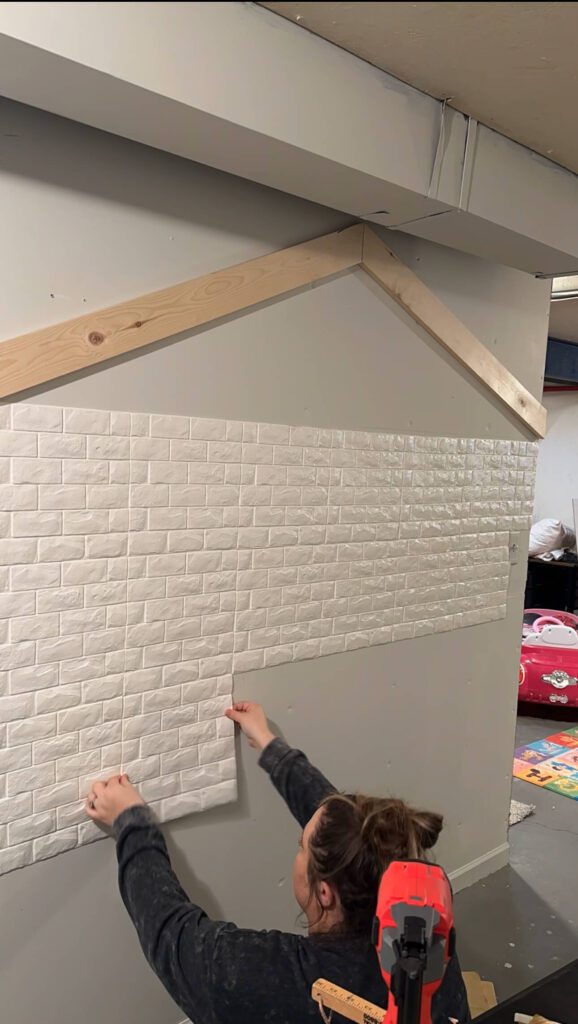
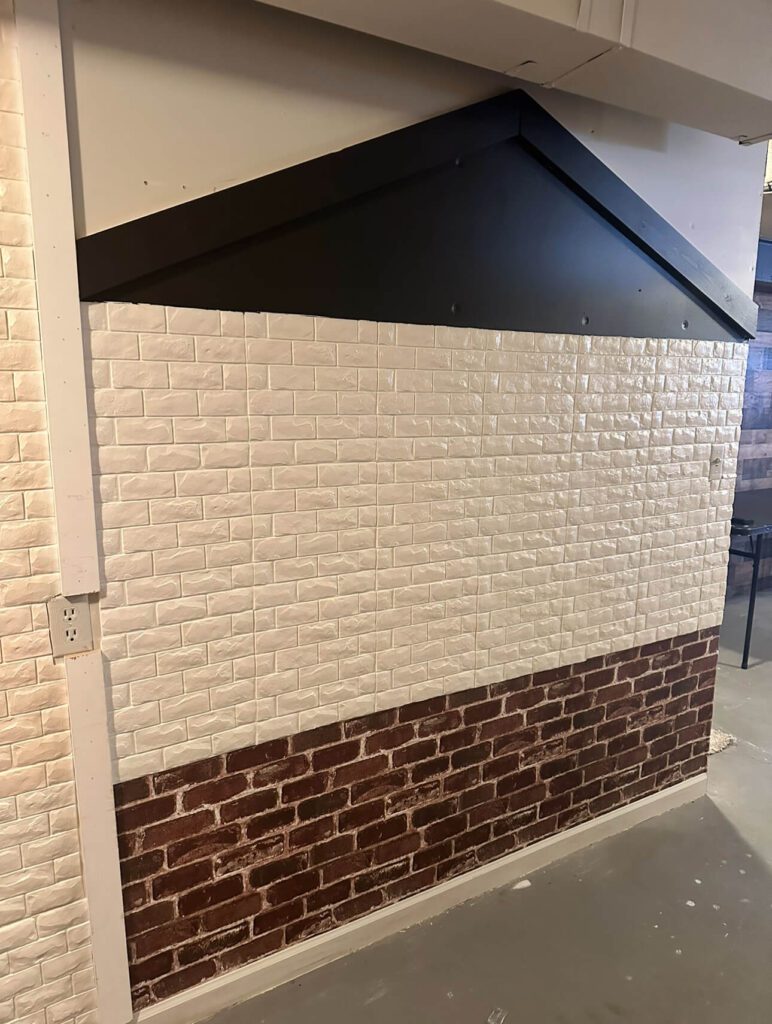
I found these peel-and-stick brick tiles from Amazon. They were so easy to apply! I loved that they added a bit of texture to the wall. These are also paintable, so that is a win! I also applied traditional peel-and-stick brick wallpaper. Then, I painted the top of the schoolhouse black.

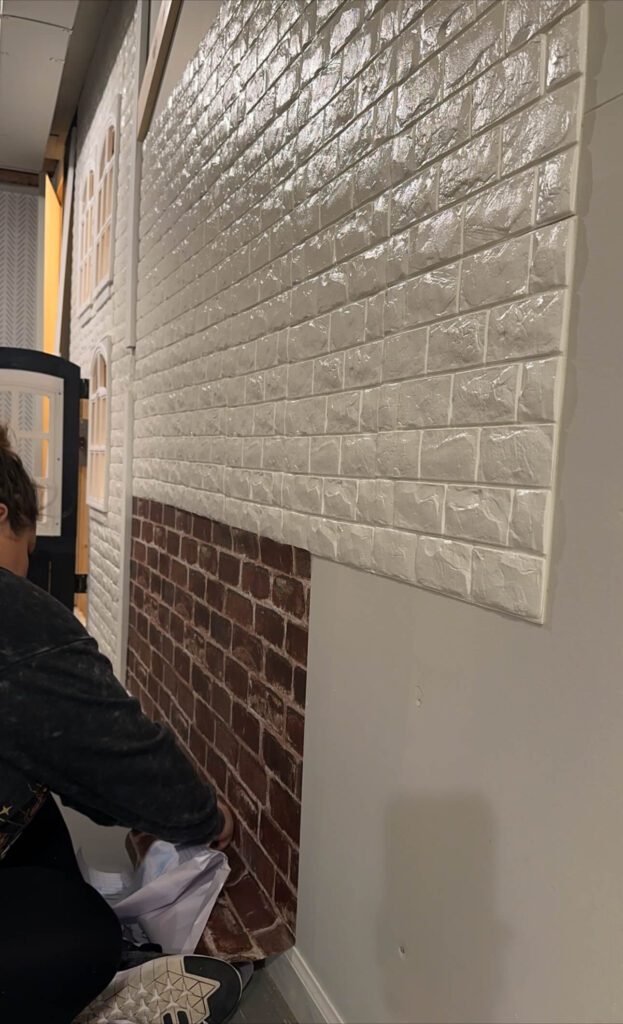
Painting the Schoolhouse
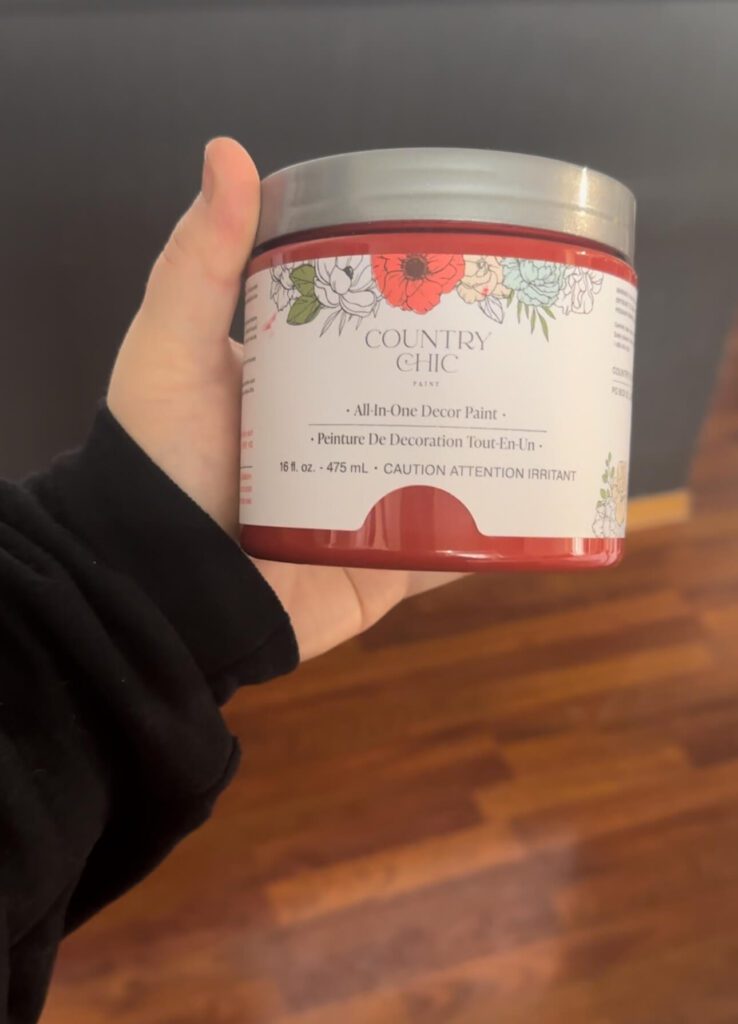
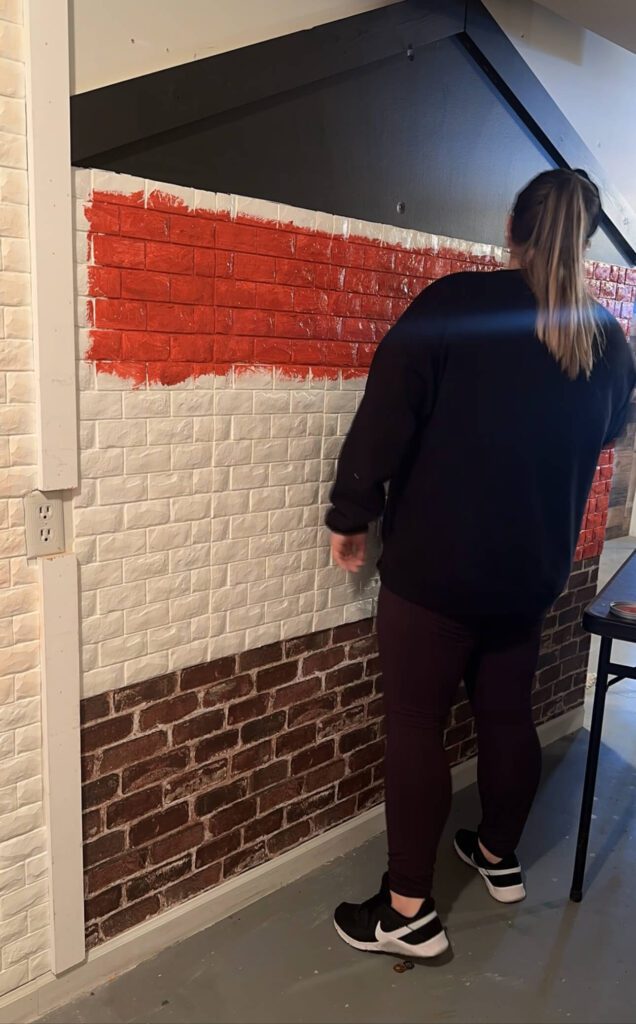
I used this Country Chic red paint to paint the textured bricks. Another option for a small area like this is to get a small paint sample from Lowe’s or Home Depot. It will save you money for smaller areas. Oh, and you can judge my painting methods all you want. I’m an impatient painter, but I get the job done!
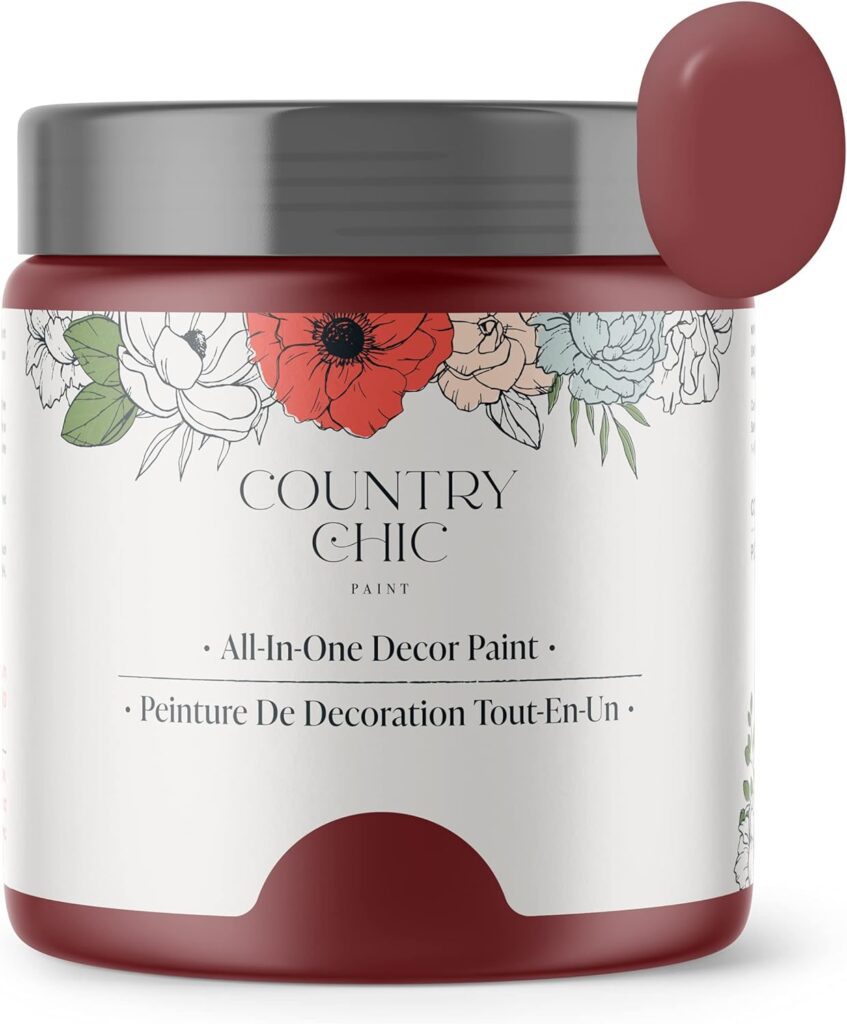
Country Chic All-In-One Decor Paint
- Built-in primer and top coat
- Works on wood, laminate, glass, metal, and toys
- Matte finish
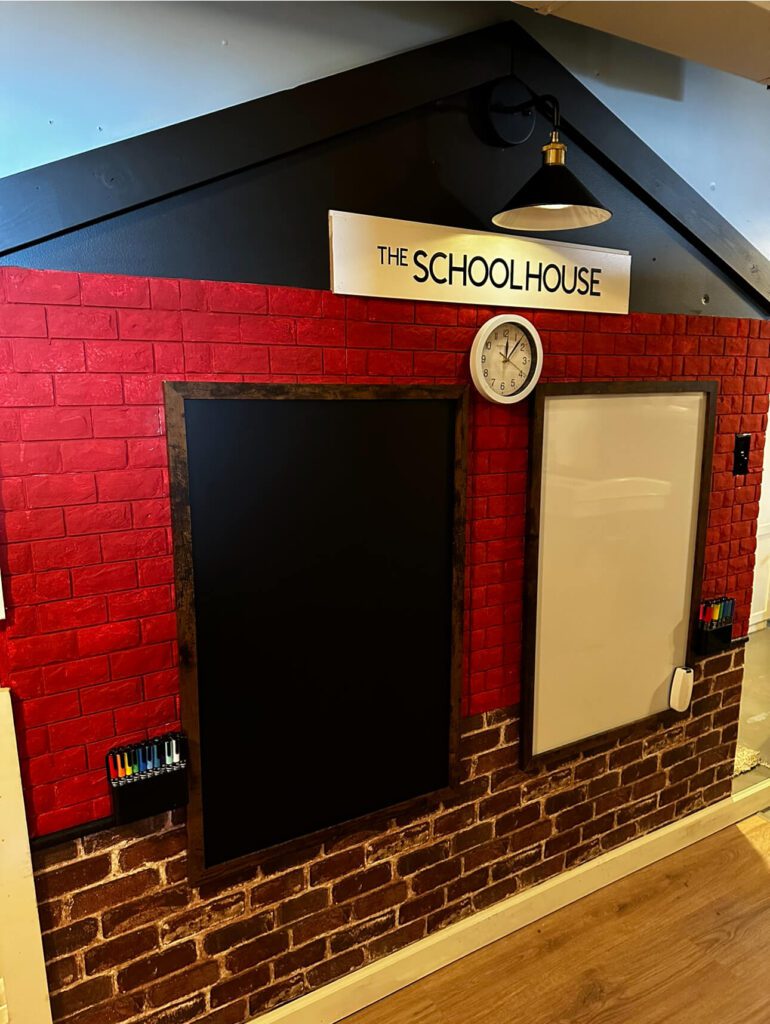
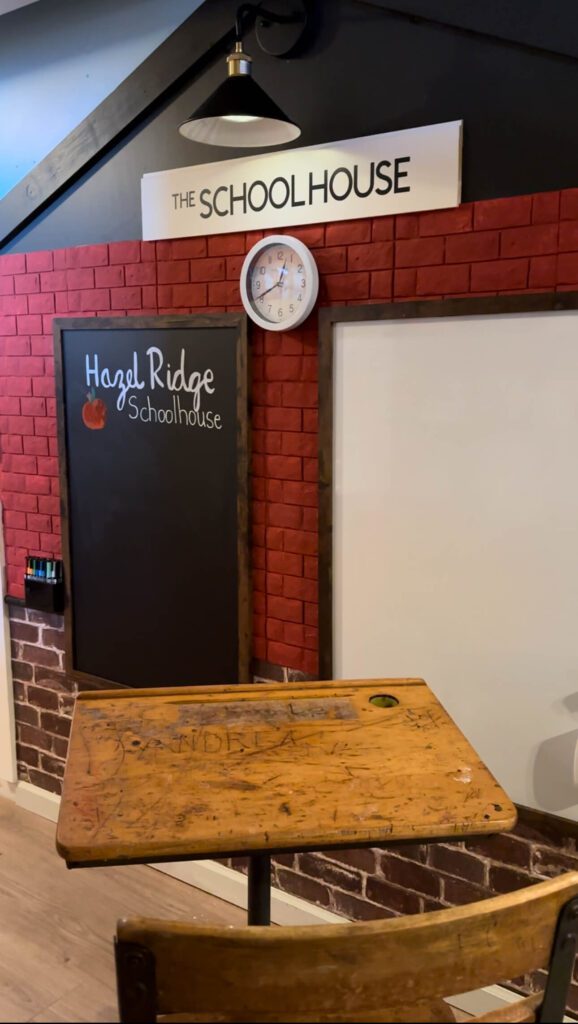
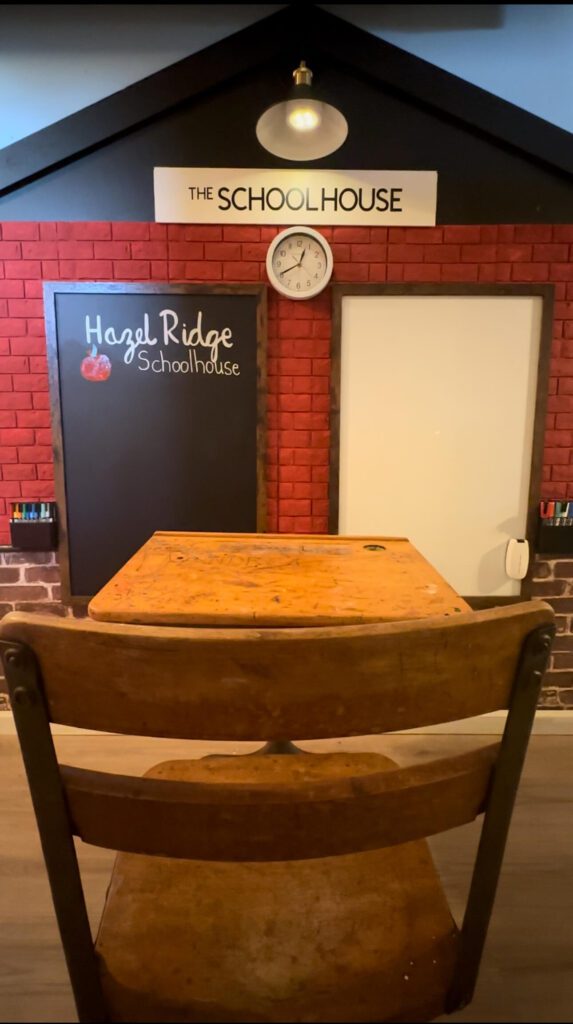
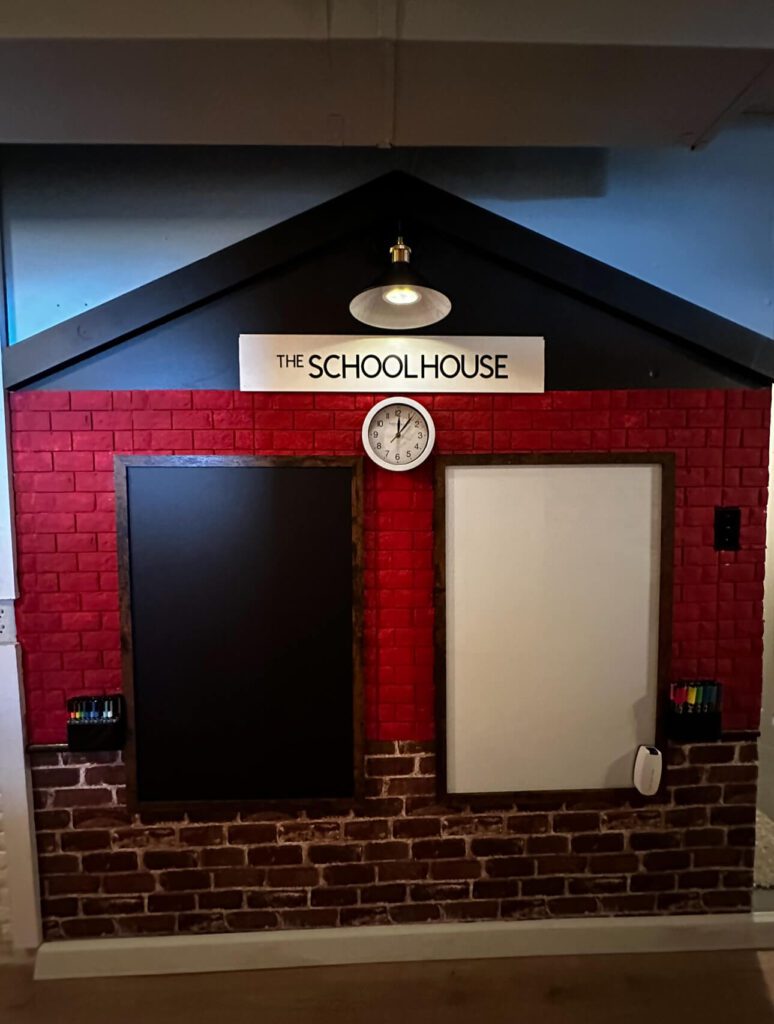
The Perfect Whiteboard and Chalkboard Combo
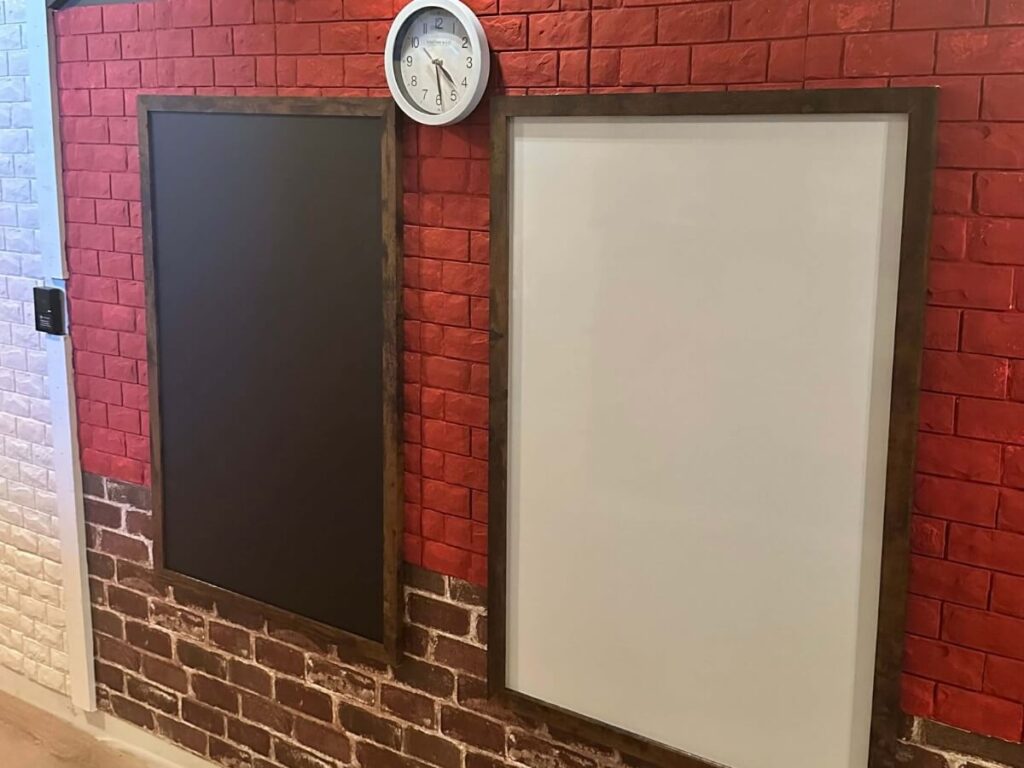
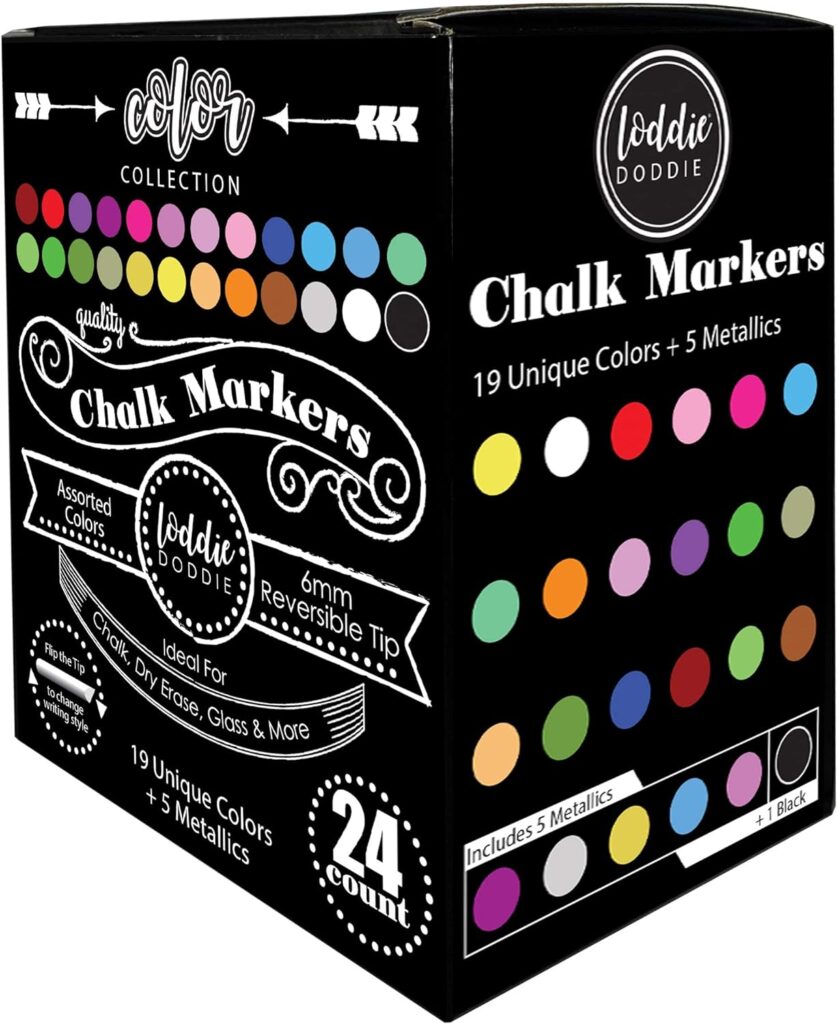
I knew that I wanted a whiteboard and a chalkboard, and these were perfect! Loddie Doddie provided me with these beautiful boards that are 24″ x 36″. Loddie Doddie is a company that sells whiteboards, chalkboards, markers, erasers, pens, and more! Thank you, Loddie Doddie for helping me create this schoolhouse area in the playroom!
Products to Create the Perfect Space
I used several products from the company called Loddie Doddie. I loved their boards because of their rustic look. Their chalk markers are vivid and come in several colors! These markers are meant to be used for more intricate designs, so I will be using them for special projects and not as everyday markers.
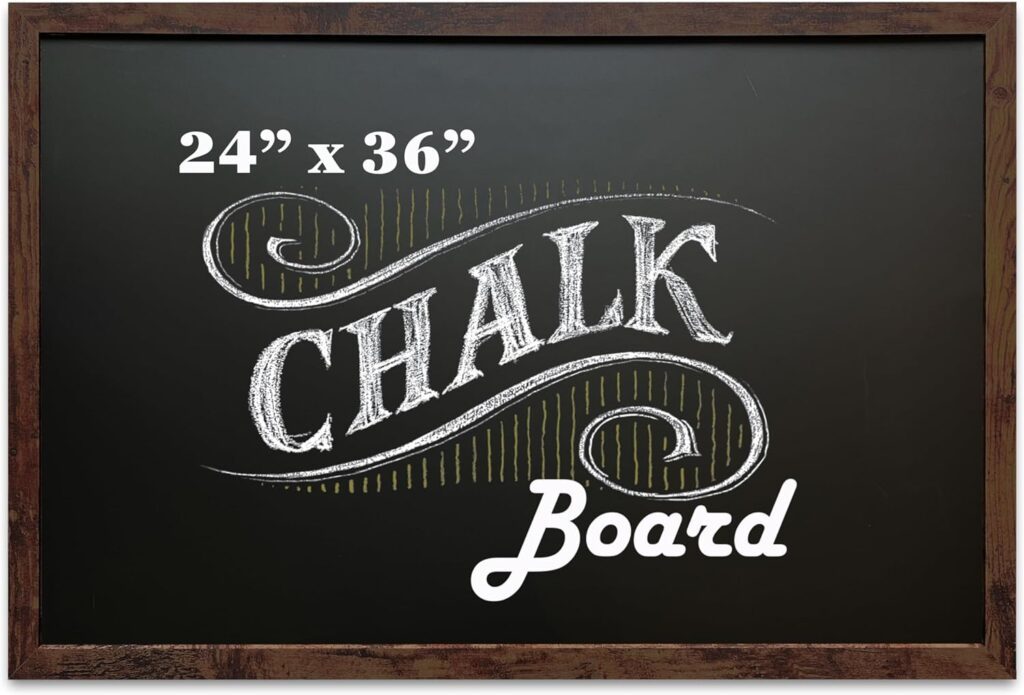
Loddie Doddie 24″ x 36″ Chalk Board
- Magnetic
- Dual hanging
- Hardware included
- Rustic look
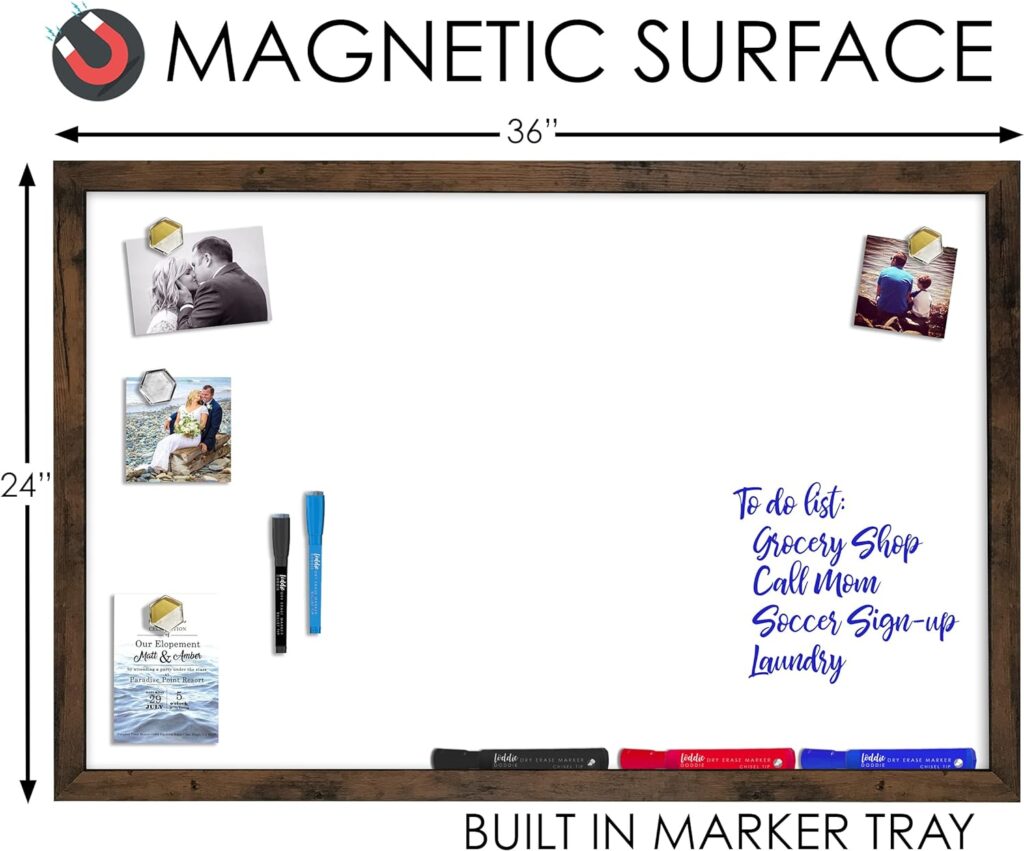
Loddie Doddie 24″ x 36″ Magnetic Whiteboard
- Magnetic
- Dual hanging
- Marker tray
- No stain
- 24 Markers
- Works on chalkboards, whiteboards, windows, and glass

Loddie Doddie Eraser & Cleaner
- For chalk and dry-erase boards
- Cleaning spray included
- Magnetic for easy storage
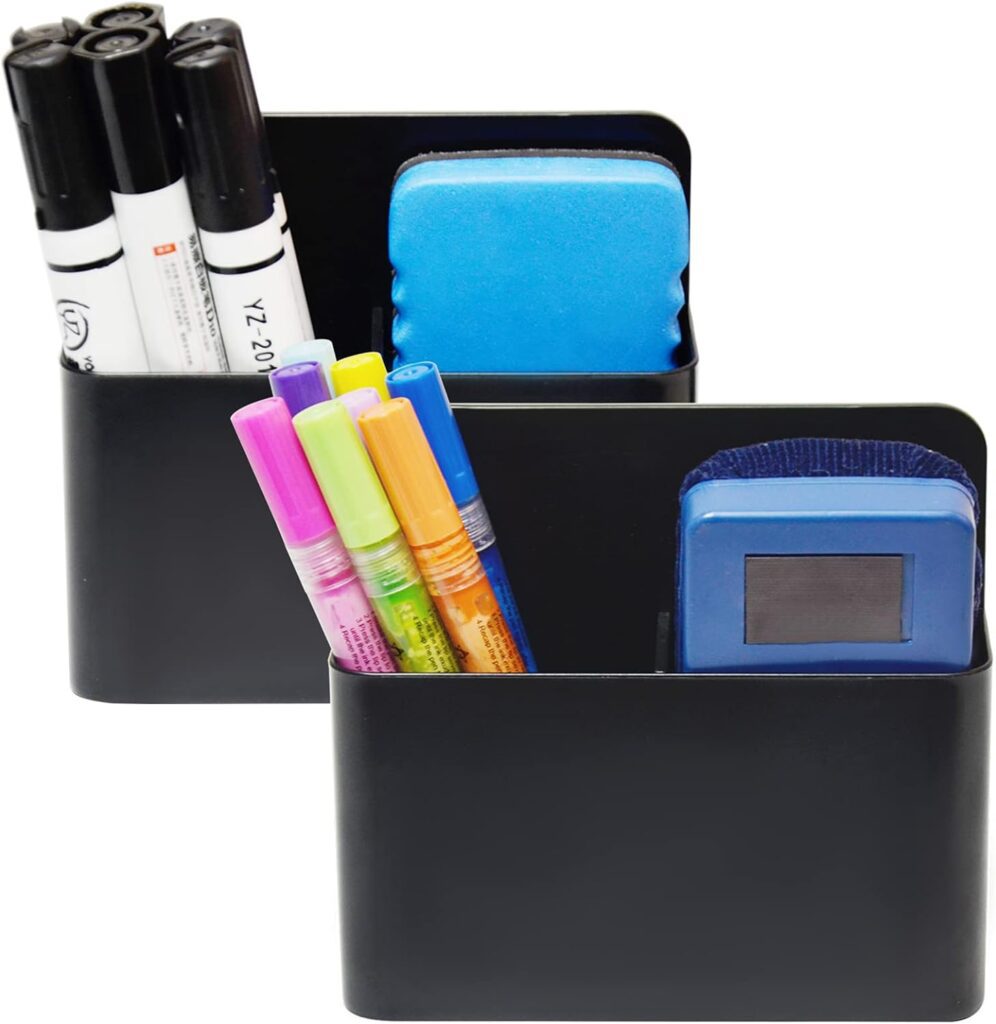
- Set of 2
- Removable block divider
- Dimensions: 4.92 x 4.72 x 1.57
Lighting & Schoolhouse Sign
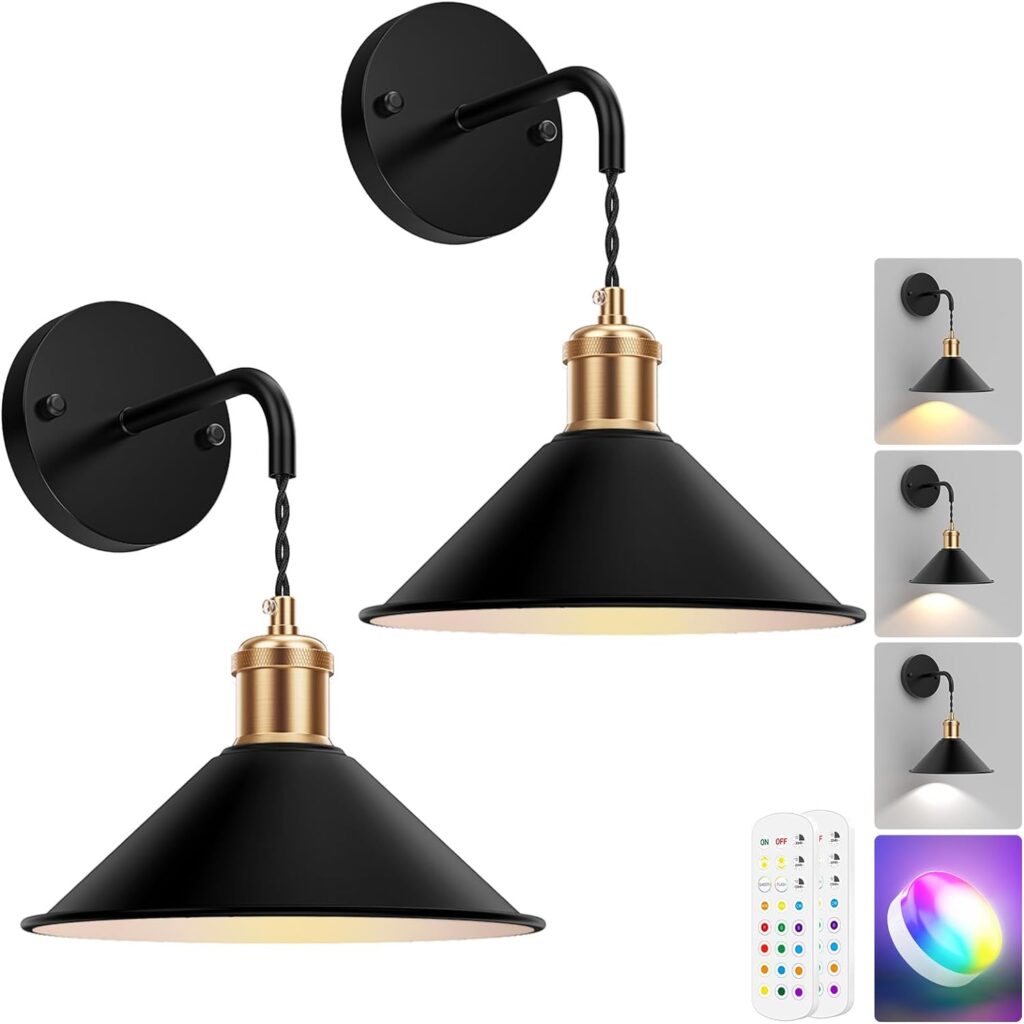
I found a set of two battery-operated wall sconces on Amazon. I am using the other one for another area in the Playroom Town. These come with a remote and have several color settings. I thought they were perfect. I made THE SCHOOLHOUSE sign using a leftover piece of shiplap and a Cricut machine.

The Final Reveal
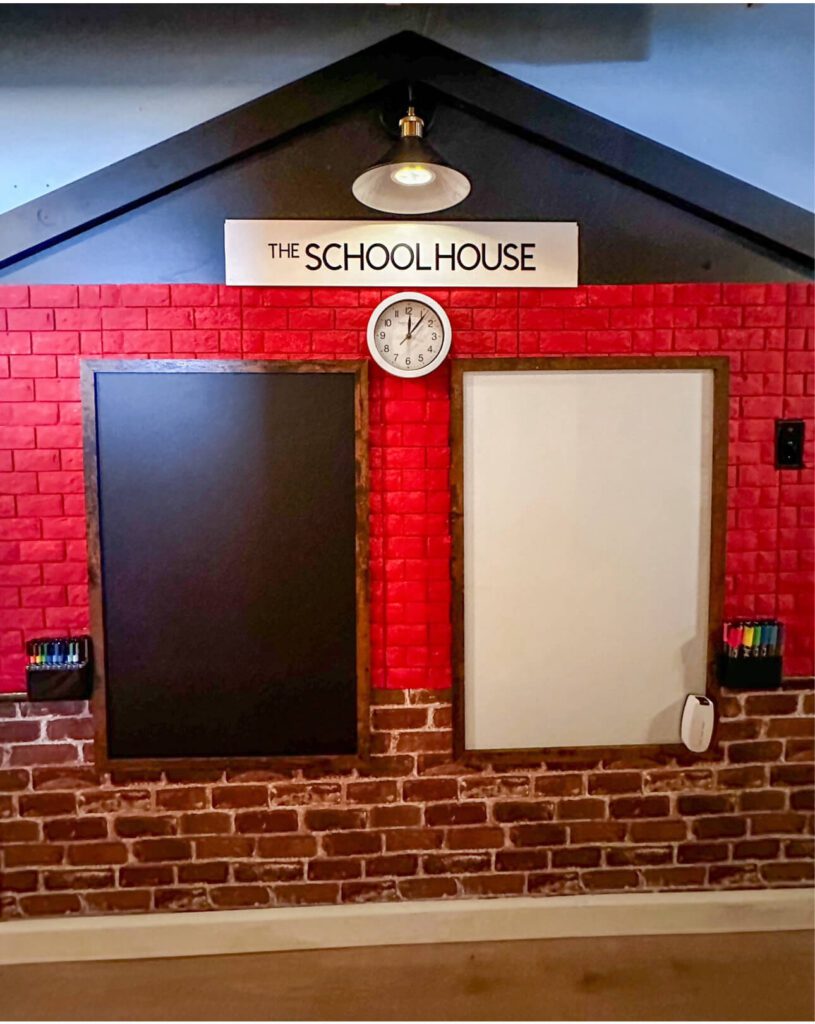
Overall, creating this schoolhouse area in the playroom was a fun and fairly simple project. The boards from Loddie Doddie really tied everything together, and I know my daughter will enjoy this space for years to come. If you enjoyed this DIY project, be sure to check out my other DIY projects!


Leave a Reply